Receiving and sending emails with Windows Live Mail
Before you can send and receive messages with Windows Live Mail it is first necessary to create one or more email addresses.
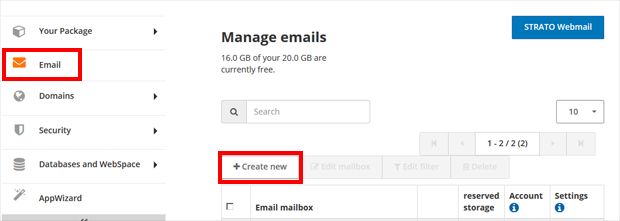
To do this, please log in to your password-protected Customer Service Area and create a new account in the email administration under Email / Email administration by clicking on the Create new address button and following the assistant.
1. Preparing Windows Live Mail
Unlike on Windows XP and Windows Vista, no email program is pre-installed in Windows 7 by default, which means that you will have to install it before you can perform the configuration.
To do this, click on the bottom left on the Windows symbol and enter Windows Live Essentials in the input field. While you are typing, the correct program will be displayed in the list and you can open it by left-clicking it.
Now your default browser will open in the background and the Microsoft Live website will appear. Click on the Download button on the right here.
A download window will appear after a few seconds. Click on the Save button and select any folder on your hard drive as the destination, for example, Desktop.
After downloading, you will find the file wlsetup-web.exe. file in the download folder. Open this file by double-clicking on the symbol with the left mouse button. The installation program will launch immediately.
In the following window, you can now select which applications should be installed from the Essentials series.
The program Mail is mandatory; all others are optional. Click on the check box so that a check is visible next to Mail and start the installation by clicking on the Install button.
The installation will run completely independently now and is normally complete after a few minutes.
Once the installation is complete, click on Next and Exit. . You can open Windows Live Mail through the start menu.
2. Set up Windows Live Mail
Once you have started Windows 7 Live Mail, the set-up assistant will start immediately.
Enter the email address in the Email Address field that you created in the STRATO customer service area and would like to use now.
Under this, enter the password that you set while creating it under Password The Save password option saves you time, because you do not need to enter your password every time you receive or send an email.
 How can I change/reset the password for my email address?
The Display Name field is used as the sender name for sent emails. Enter your name here. Finally, click on Next.
In the following window, you will be asked for the server data needed to retrieve and send emails.
What is IMAP and how can I use it?Server data
Outbox server with IMAP: imap.strato.de
The outbox server is smtp.strato.de and requires authentication . Please enable the check box in regards to this.
End the setup by clicking on Next and then Finish.