How do I set up email forwarding?
This article describes how to set up forwarding to another email address in the STRATO customer login. When using multiple email addresses, it makes sense to forward one or more of them to another email address. This has the advantage that only one email box needs to be checked and all incoming emails are collected in one mailbox. Only one email box needs to be set up on the end device.
Set up forwarding for an email address
To set up forwarding for an email address, proceed as follows:
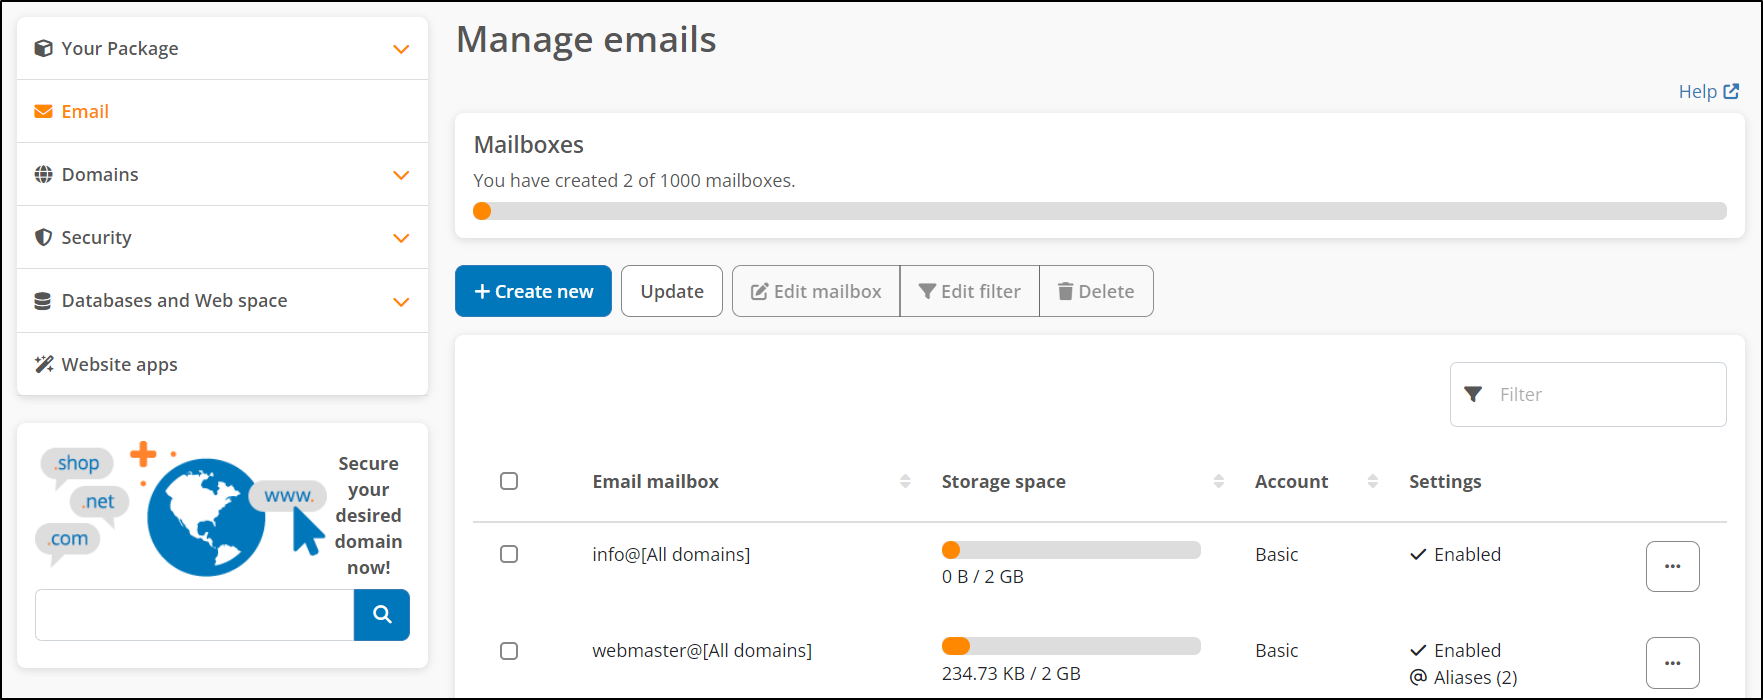
Log in to your password-protected STRATO customer login and select the email management in your package.
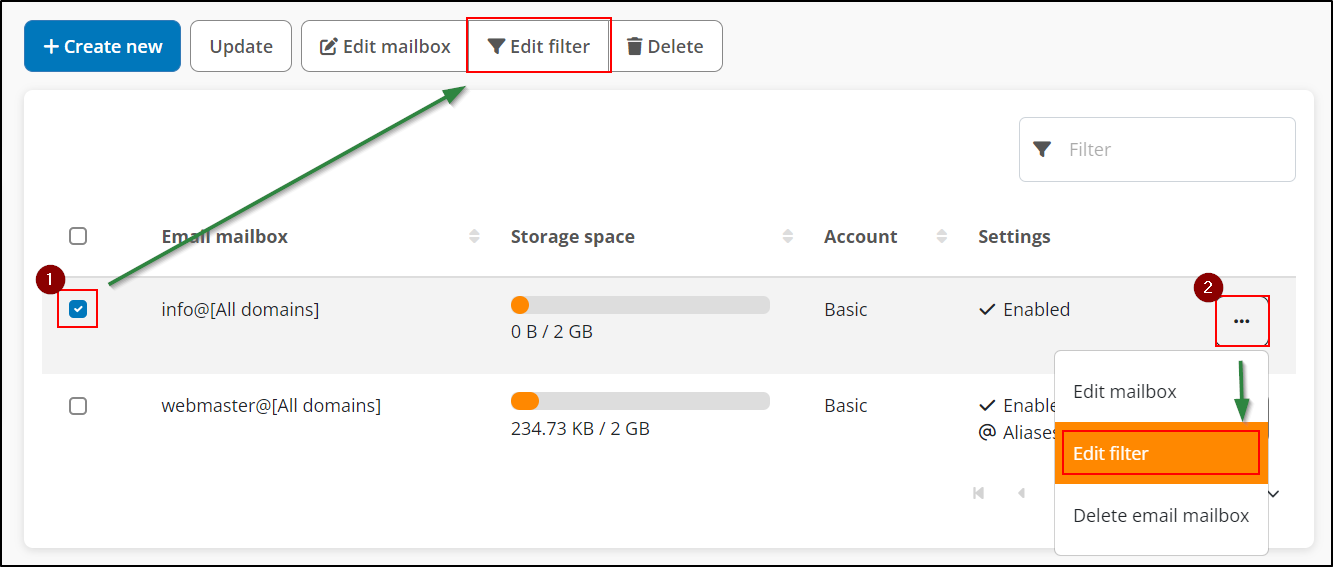
Select the mailbox from which you want to forward emails and click on the »Edit filter« option above this mailbox. Alternatively, click on the »3 dots button« to the right of the mailbox and select »Edit filter« there.
In the next step select »+ Create new«.
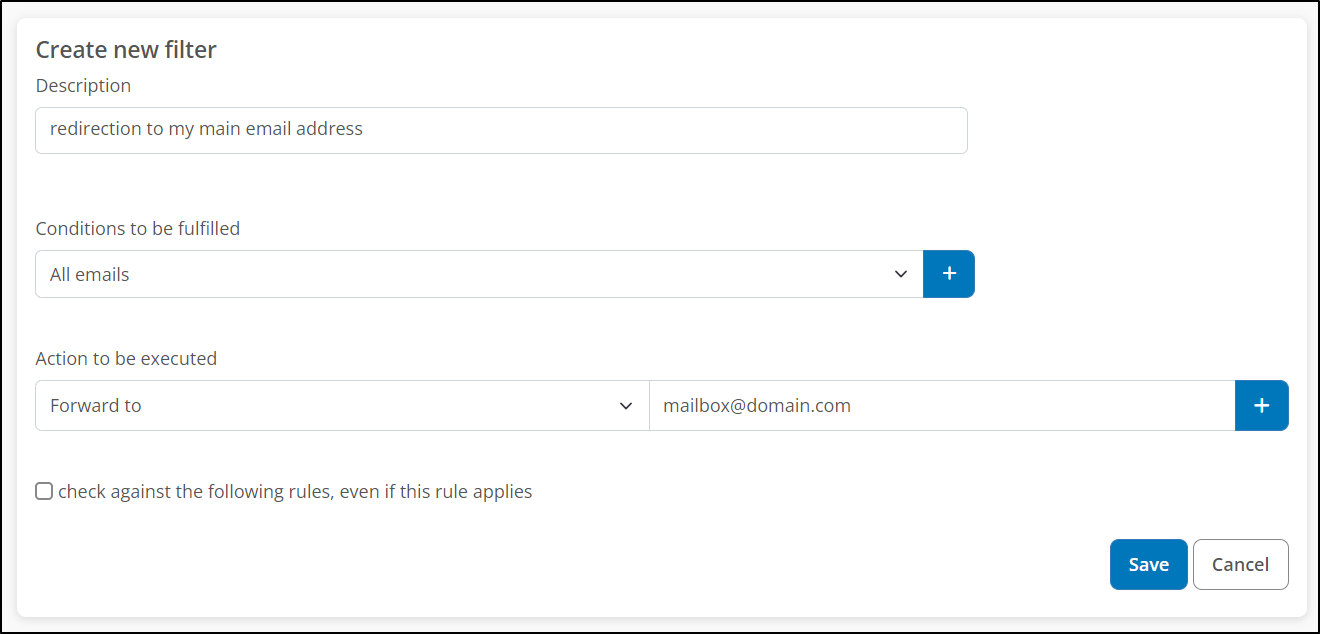
Give the filter rule a description to be able to find it later, and specify the conditions that must be met for the desired action (e.g. forwarding) to be performed.
If you want to forward the entire inbox to another email address, select »All emails« as the condition to be fulfilled. Select »Forward to« as action to be performed and enter the desired destination email address. With »Save« you create the rule.
If you want your emails to be deleted after forwarding, please click on the »+ icon« and select »Discard« as further action.
Set up forwarding (redirection) in STRATO Webmail
To set up automatic forwarding of your incoming emails, first log in to STRATO Webmail.
After logging in, please click on the »gear icon ⚙️« in the upper right corner and then click on »Settings«. Select the menu item »Mail« on the left and then »Filter Rules«.
Now click on »+ Add new rule« to create a new rule.
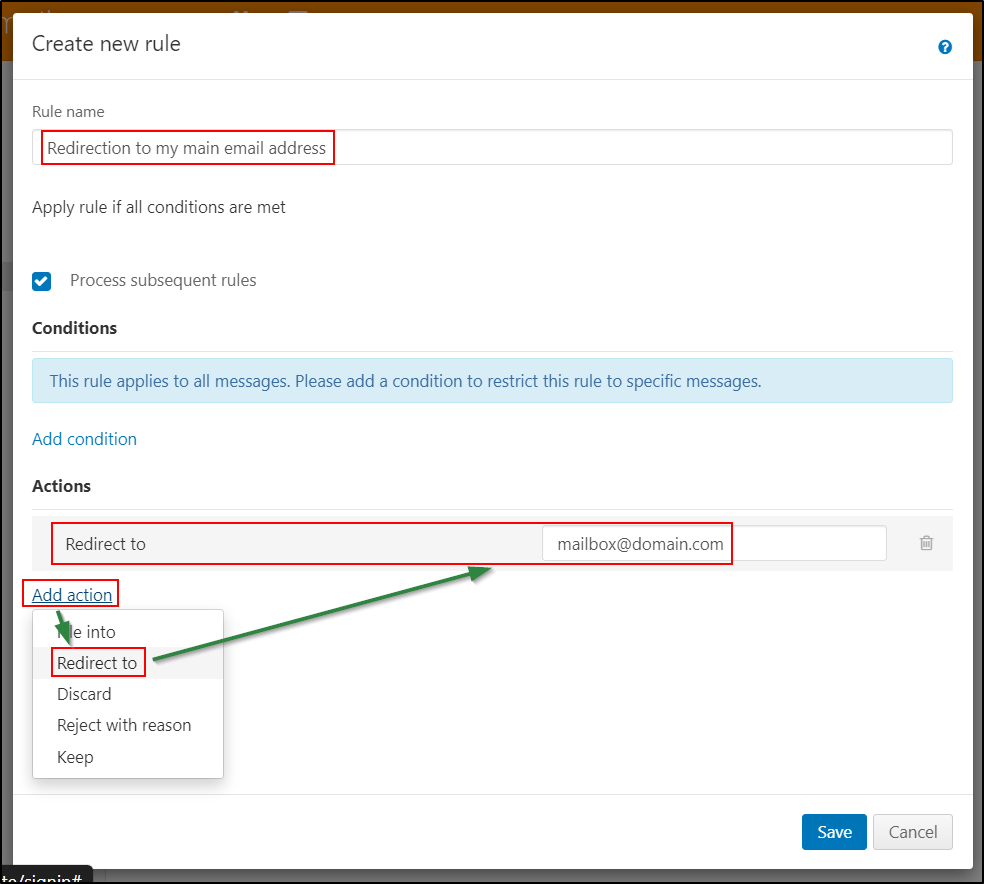
Enter a rule name for your rule. By default, the filter rule will be applied to all messages. If you don't want this, define a special scenario via »Add condition«, e.g. »From« contains »Invoice«.
As an action, add »Redirect to« and enter the email address to which you want your emails to be forwarded. Finally, click »Save« to create your rule.
With the described settings, the original emails will be preserved in the webmail mailbox. If you want a simultaneous deletion of the emails for the webmail, you can define another action »Discard« within the rule.


