This is how you can use the Directory Protection Manager
Regardless of whether it's a private photo album or an exclusive area for business partners and employees, not all information is intended for visitors to your homepage. With the Directory Protection Manager, you can now start creating protected areas on your website through the web interface and configure user access.
We will provide you with a wizard that you can use to quickly implement the Directory Protection Manager.
Important
Please remember, that depending on the configuration, the Directory Protection Manager creates new
 .htuser, .htgroup and .htaccess files and overwrites any existing .htuser, .htgroup and .htaccess Before using the Directory Protection Manager, we recommend backing up these files locally, provided that you have created the corresponding files in advance.
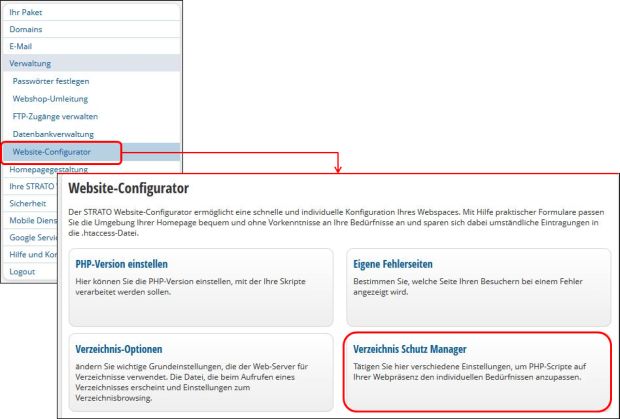
Log in to your password protected Customer Area. Then select the desired package in the bottom right window. Now click on the left side on the menu items Administration / Website Configurator.
Now you can click in the right window on the menu item Directory Protection Manager.
A new window will now open for the Directory Protection Manager Administration.
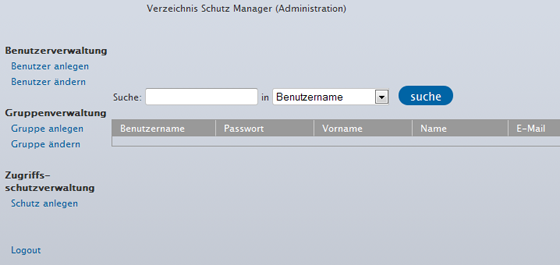
After you have logged in to the administration area of the Directory Protection Manager, the following options are available:
- User administration
- Create user
- Change user
- Group administration
- Create group
- Change group
- Access protection administration
- Add protection
Note:
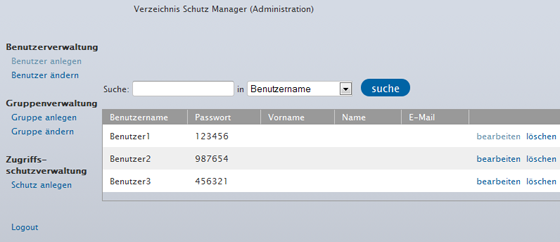
Please remember that user names and passwords may not contain any special characters. Only lower and upper case letters and numbers are permitted. The minimum length for user names is 5 characters. It is not possible to change the user name for a user that has already been created.
After you have created your users, these are displayed again in an overview.
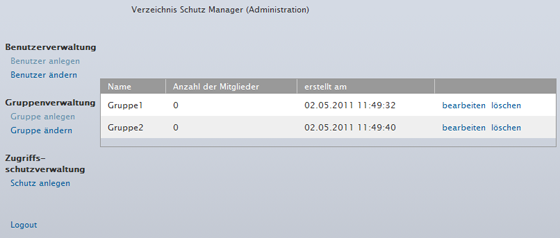
In the group administration, you have the option of assigning different users to a group. However, you will need to create one or more groups beforehand. After you have created your groups, they will also be displayed in an overview.
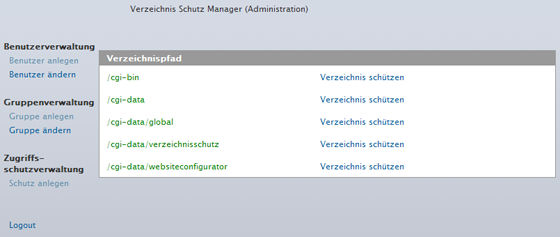
Now click on Protect directory after each folder that you would like to equip with directory protection.
 Note
NoteIf you have other sub-folders in a folder and do not want to apply other user settings to them, these sub-folders are also assigned the user settings of the superior folder.
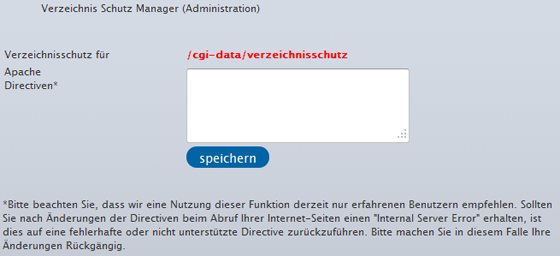
In the next window, you can save the settings or set your own Apache directives. We recommend that only experienced users use this option.

You can now easily add the corresponding users to the group or to remove them again.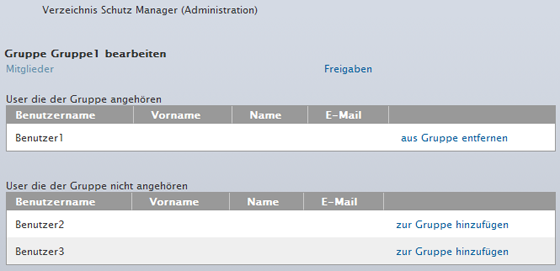
Of course, you can also assign this user to a group via the menu item Change user / Edit and then under Group assignment.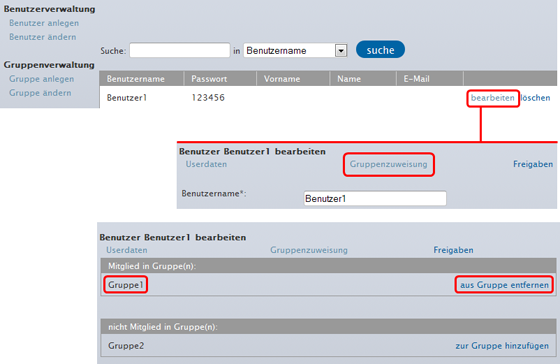
How do I approve the group/users?
After all steps have been executed, you can now assign the approvals for the selected folder to the corresponding groups or users. At this point, you can either issue an approval for individual users or to the entire group.
 Approvals. Here, you now have the option to issue approvals or to remove them again. Analog to our example (approval for groups), you can also do this for any individual user.
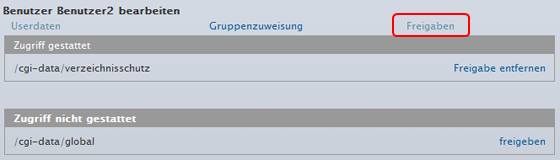
In order to disable the directory protection, please click in the administration area on Create protection. Now you will see the complete directory path from your FTP area again. The protected folders are marked in red and the unprotected ones in green.
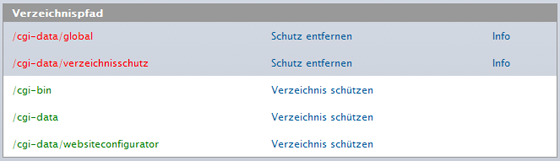
By clicking on Remove protection you can remove the directory protection previously set. If you click on Info, the access rights from the groups and users will be displayed.
Example:
If a page is not found, the web server will show the visitor an error page. This is a standard page from the web server. With Apache, however, your own pages can also be displayed in such a case. To do this, you only have to add an entry in the
.htaccessfile. This means that what would be in the .htaccess file can be entered in the text field. You can find more information about .htaccess files under http://wiki.selfhtml.org/wiki/Htaccess
 Please note , that the Directory Protection Manager saves a new .htaccess file on your web storage space. For any existing .htaccess files, a backup will be automatically created for you. You can recognize the backup by its name .htaccess.bak — the content of this .htaccess.bak file is no longer taken into consideration. Thus, it may be necessary for you to enter this manually into your new .htaccess file.